
Archer
This class on average performs the highest through the Early Game. While it can lack up to level 70 it will quickly regain its place afterwards
Gear
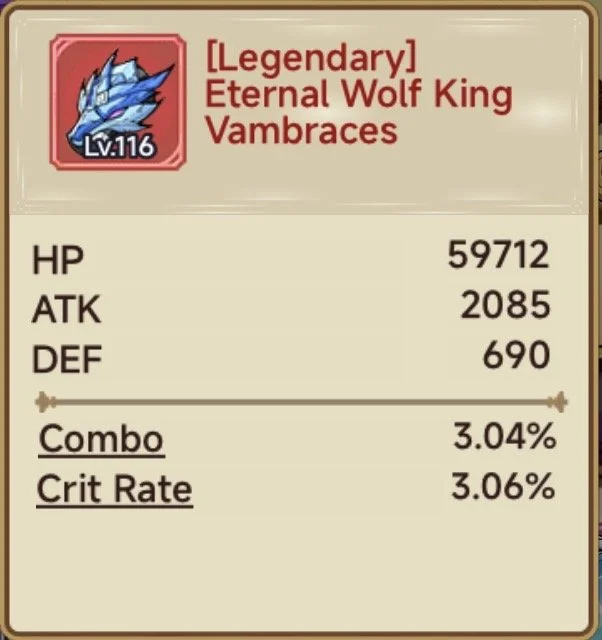
As shown above, your two desired affixes are Combo & Crit Rate
Skills & Pals
As Archer your damage all comes from attacking quick and hard. You are built more as a glass cannon so we want to build slows and stuns through this section to keep things away from you
Blue & Below

Skills: At the very start Skill DMG is the main source so we are just going to use the higher rarity stuff, Speed Surge however is great for archers and will stay with us for some time. At this point I didn’t find a need for delays
Pals: This is mostly the arrangement we will look to keep throughout. Fortune Dragon is a weaker version of the eventual Treasure Dragon so is a must to get Crit DMG up
Purple & Below

Skills: Now we have 2 slows I used a 2s Delay on Pearl just to keep the slow effects seperated, the pineapple was just my highest damage option
Pals: No changes to arrangement here just upgrade on Hydrosprite
Yellow & Below

Skills: I switched away from the dual slow here and instead went for the shield, we can’t slow things down completely without items so I found using the shield to stay alive longer was working better here. I used a delay on Shroom Shield for the moment I started to take damage as to not waste it
Pals: No changes except rarity again here
Orange & Below

Skills: Only change here is Easy Breezy, this helped keeping boss damage lower, like with Shroom Shield I delayed this for when I started to take damage
Pals: Now we have access to Mecha Dragon, while his bonus isn’t amazing it is better then 5% Combo from Banana
Red & Below

Skills: I found the Stun set up started working really well here, I put a delay on Dazzled to start as I took damage and Disarm for 1s after Dazzled this allowed me more time to get the kill off. Smoke Bomb is great for extra damage. In this set up you can add Worldly Snare instead of Speed Surge if you have it
Pals: No changes, can change Mecha to Angel Deer if starting to die
Pink & Below

Skills: This is now the Stun set up fully, works great when you can’t reach 100% slow. Blitz delay for just before taking damage
Dazzled delay for 0.5s before Blitz ends
Clone needs to be delayed 0.5s after Dazzled
Disarm 1s after Dazzled
Pals: Swap Treasure Dragon in now and I equipped Angel Deer as I wasn’t quick enough on the kill to get it under full protection
Relics


Crit Mask can be swapped for Combo Mask depending on what you lack
After your Spore the main relic to upgrade is Kite
I used Beasthide for most of the entry until around Orange Skills when I started to take too much damage -> Switch to Immunity Book if you are dying
Prayer
As shown below, the affix you’re after is x5 Global Combo DMG

Star Arrays
The Ideal

I was lucky enough to get this straight away. Other options could work, main stats to focus are ATK SPD/ATK/Crit/Combo/Boss DMG
Avians
The Priority Affixes


These two affixes are your main as Archer and are used in both PVP and PVE so I recommend getting these two before levelling your Avian. The avian counts for less but if you can get Firefly/Michelle/Cloud thats even better!
Note: Other options 'can' work you may just have to compensate in other areas in the mean time
Souls
The priority order will be -> ATK/Crit DMG/Combo DMG -> HP (If needed)
Note: Before reaching Red/Pink souls you can’t reset and only disenchant so be cautious. Levels are subject to you so see what split works best for you
Back Accessory (Tree)
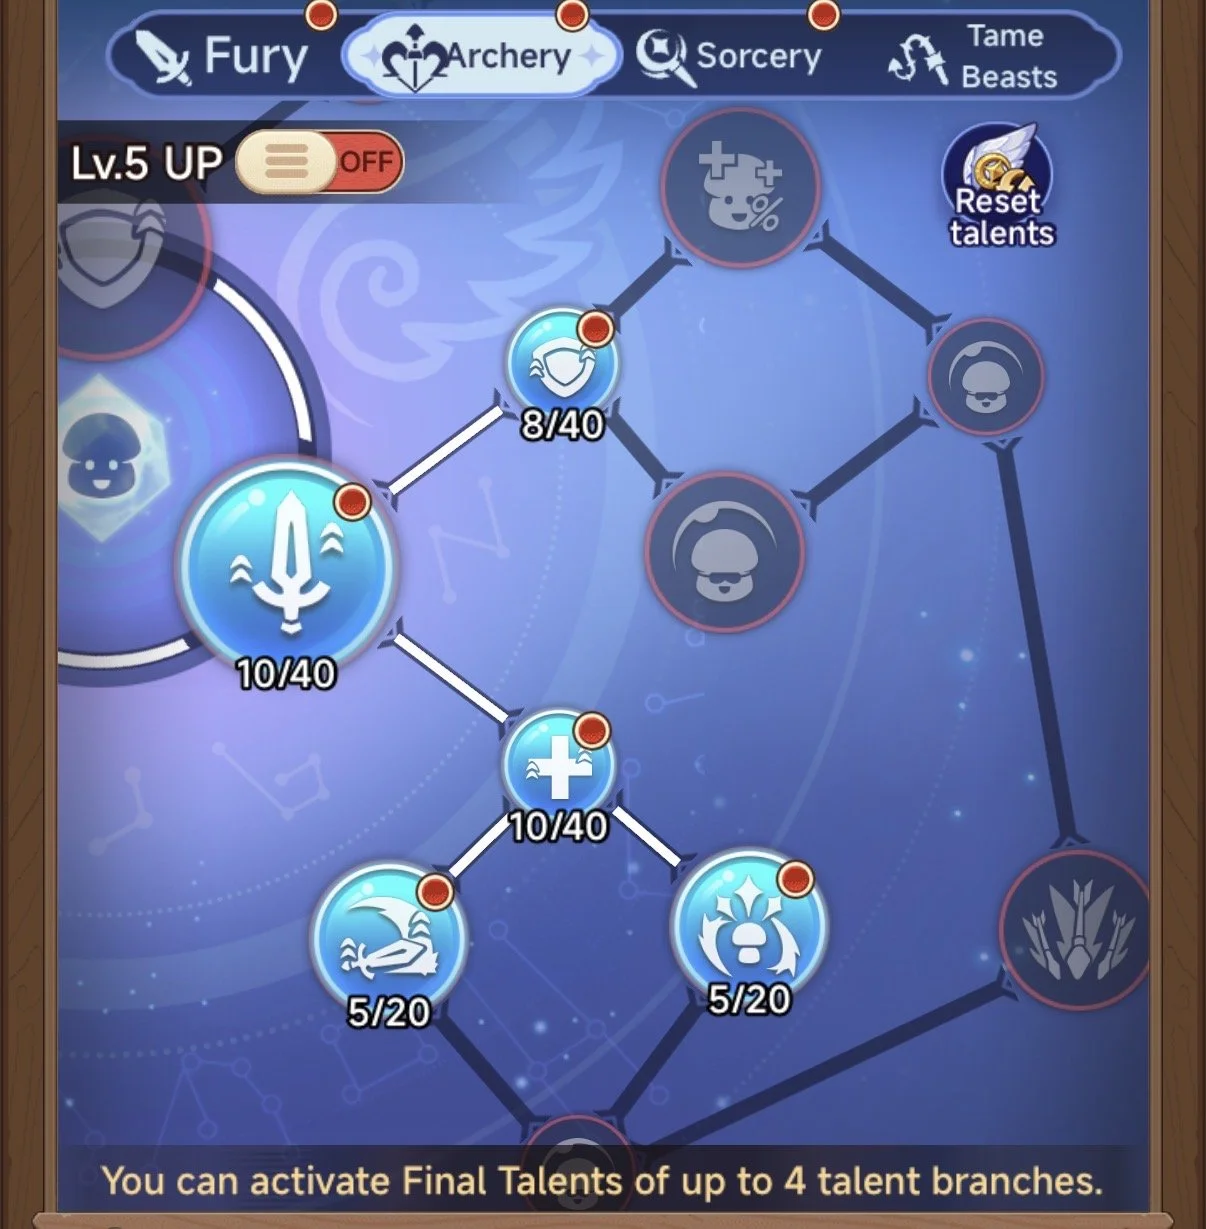
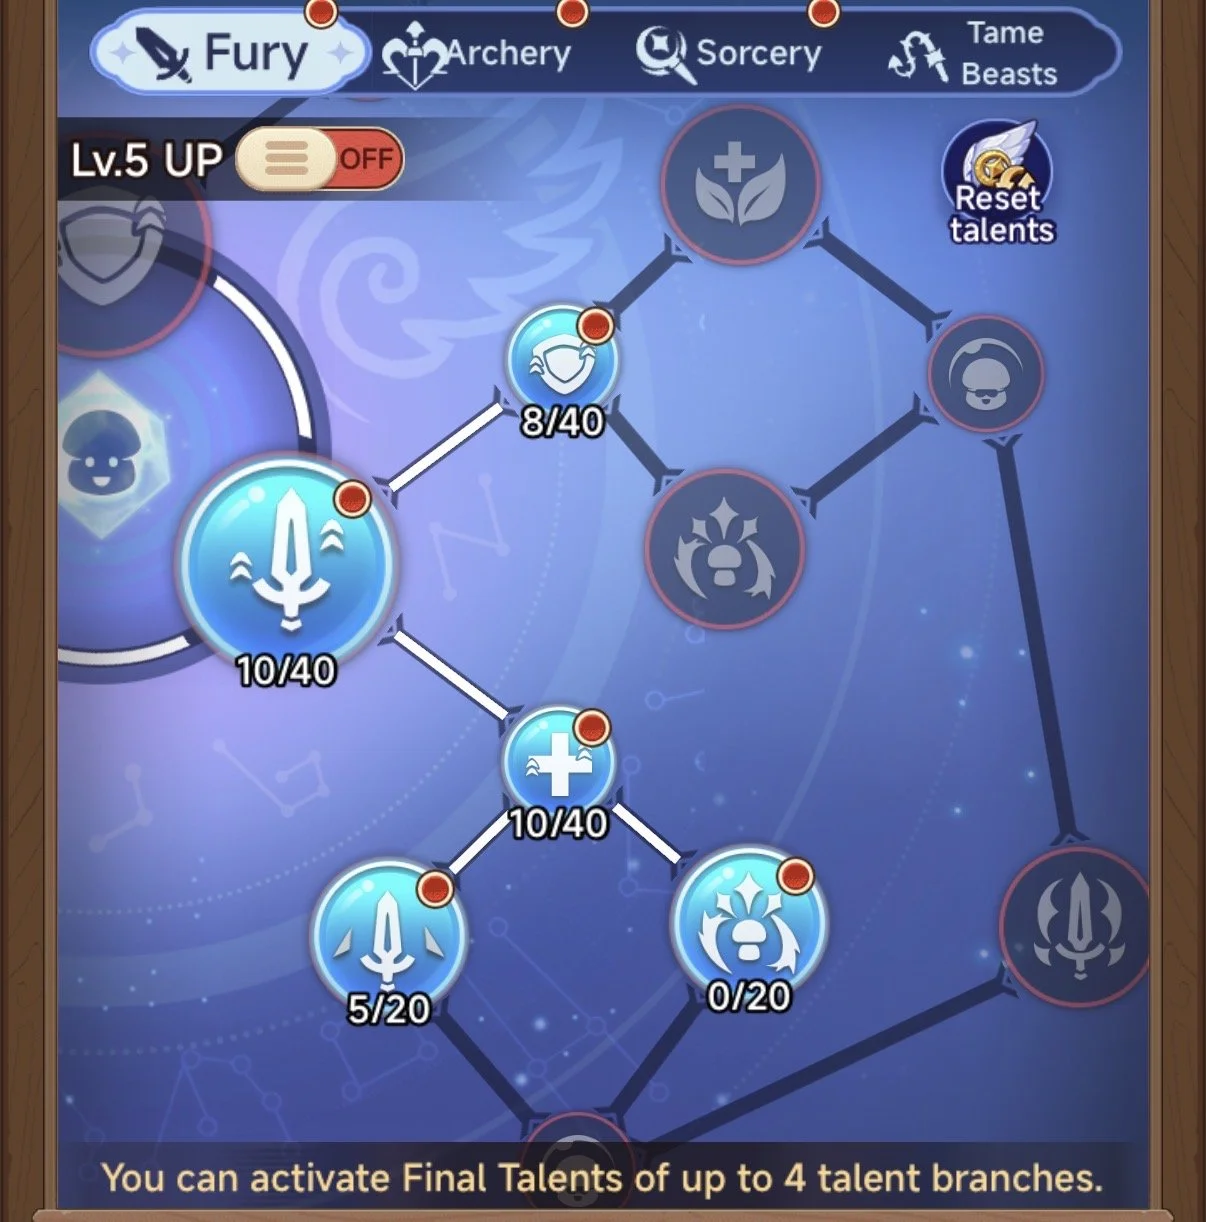
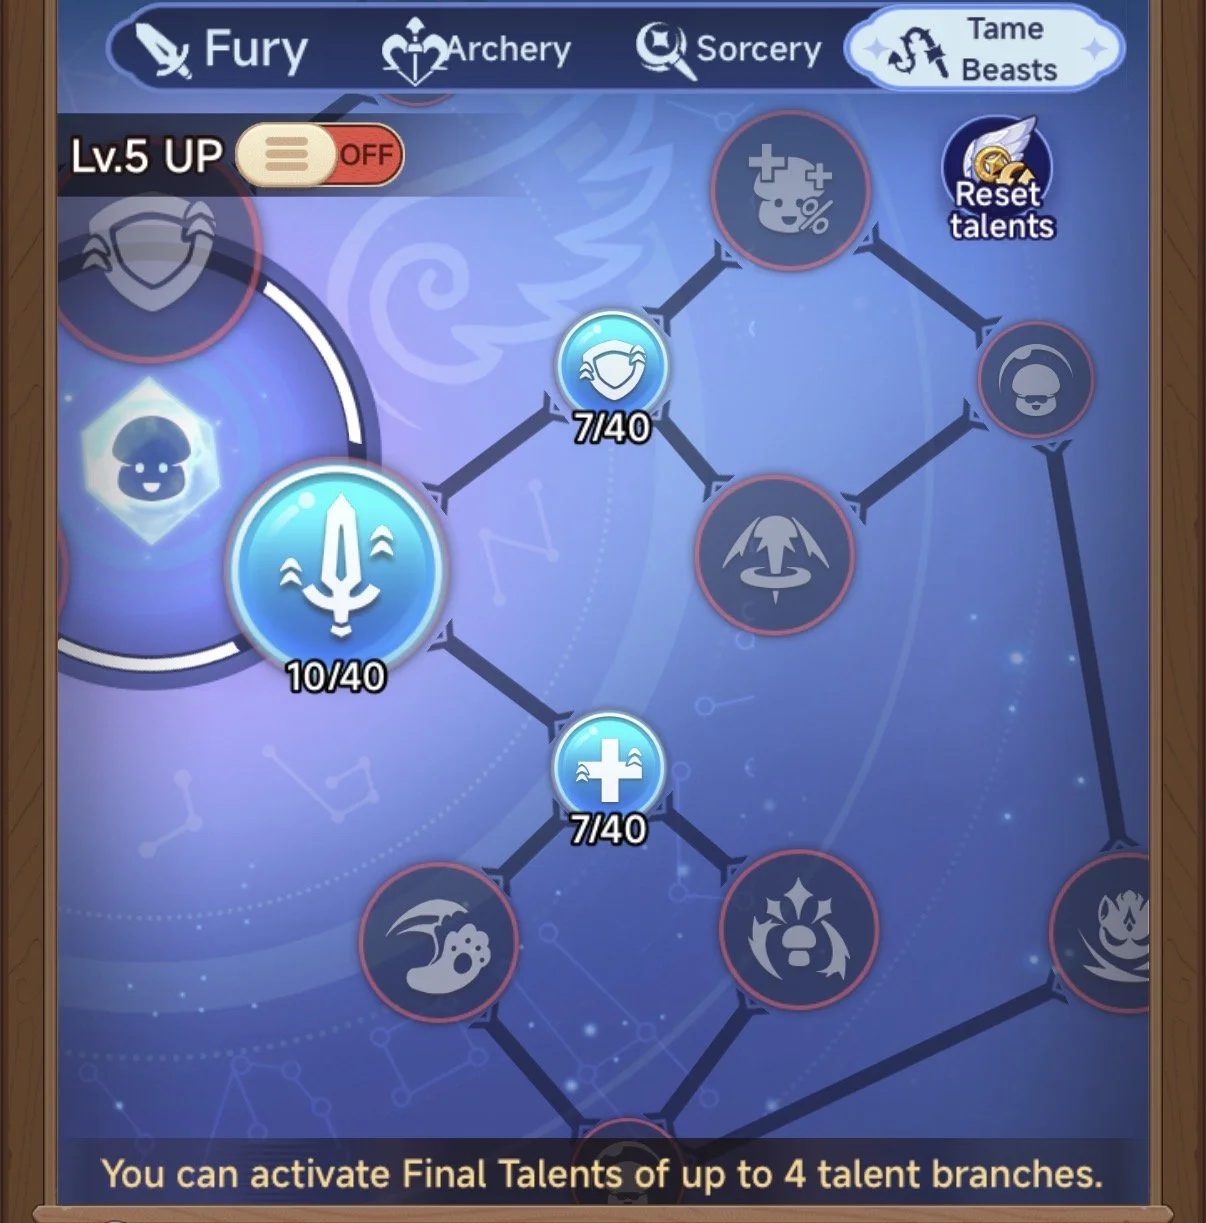
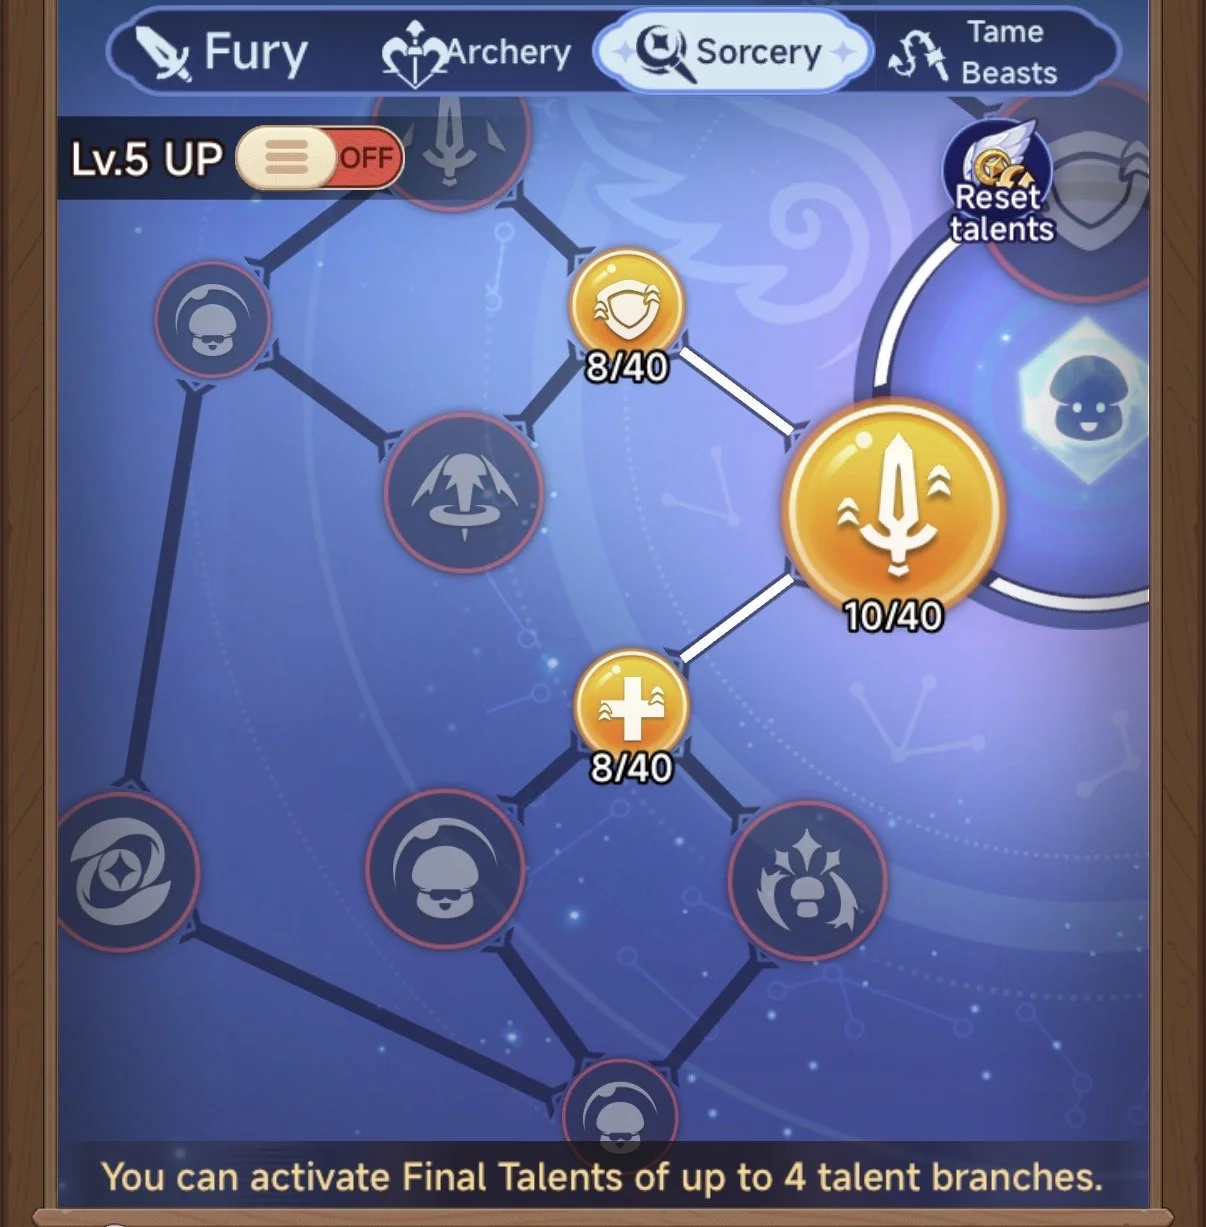
Once you have enough to reach the Nodes I went to, these are the ones you want. Keep them equal as they’re all going to be worth around the same amount to you
Keep base stats equal with each other and just get them to 10/40 and the Crit/Combo DMG/ATK SPD to 20/20 over time
Switch Sorcery to Blue Path for Energy Regen SPD later on
Divining
Your main obejective for Life Path will be Combo and Crit Rate as you want to get these to 100%
Guardian
Green
Blue


Purple

The main ones Early Game are the Energy Regen SPD ones so I recommend getting these
Remold Priorities -> Combo/Crit Rate to push up to 100%
If you have completed this, please refer here for more guide!