Team-Up Modes

These are all the modes where you work with others to reach the objective!

Dungeons


Ruined Ancient City

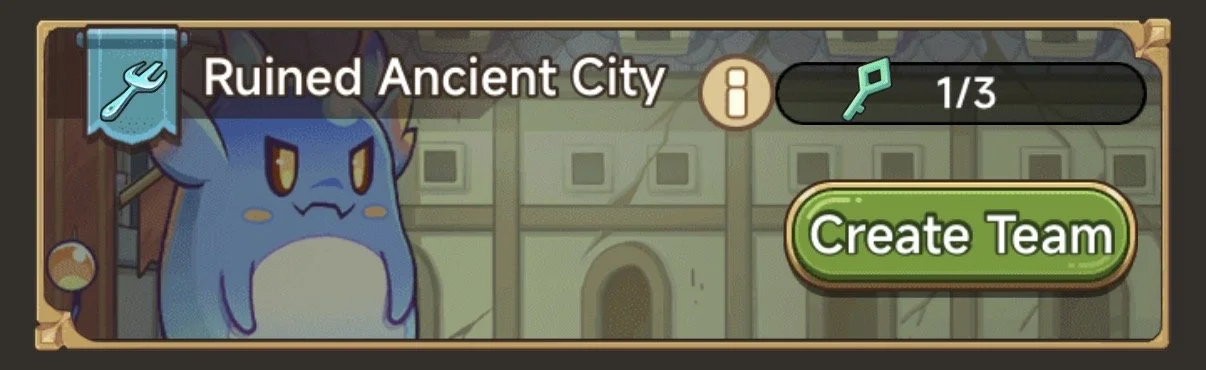
In this dungeon you will team up in 3s (you can use random bots). There are 30 levels, after the first few they will release weekly until level 30
You can use the “Sweep” function inbetween level releases <- This feature unlocks after level 6

It’s recommended for at least one person in the line up to use a slowing set while the others use more DPS focussed builds

The rewards for this dungeon are; Relic Shards and Primeval Breaths. These are used to upgrade your Relics


For more tips on passing through this dungeon check out the guide below by Leroy, he goes into lots of depth and includes builds!

Ruined Ancient City Guide + Builds - By Leroy (Discord Link)


Cloud Ascension

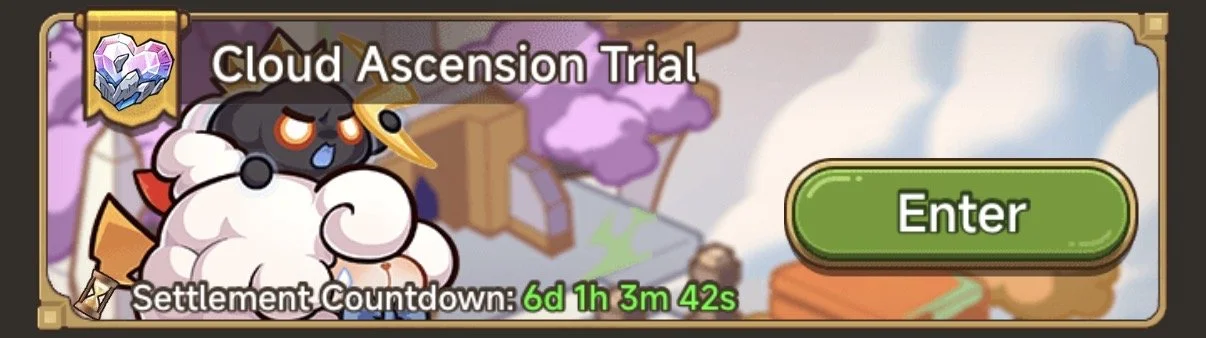
This dungeon is a 2-Player dungeon. I highly recommend requesting help from the strongest player in your server for this

To get started you must first choose a Comrade, you can either use one of the 3 provided or request help by clicking “Comrade Recruitment”. Try to have your Comrade use a DPS set if they are the stronger of the two or use a Slow set if they are the weaker as you will likely need to slow the targets throughout this
You can change Comrade at any time, it will reset the level you are on but not move you back any difficulties

Note: If you are recieving lots of invites you can change some settings in “Assist Settings” to either change your set, turn off applications or have the applications auto accept

Once you have your Comrade you can go to Dungeon Entry and start passing through. For each level you can switch positions, there are two front (2,4) and two back (1,3). There are also bonuses that can be activated depending on these positions so make sure to select the right bonus and set yourselfs in the correct positions (List of all ‘Tactic Settings‘ below)

If a player dies they will go into ‘resting’, while in resting they will regenerate HP after each level completed, you can place people in and out of resting as much as you wish. If you feel you could do better on a completed level to try have a player higher HP for the next you can click on the complete level and click “Challenge Again”

Note: There is also the occasional level where it kills anyone on all but 1 position

  • Shield Recharge

    Characters on positions 2 and 4 gain a shield equal to 10% Max HP after battle starts, while characters on positions 1 and 3 gain 50% extra Skill Energy Regen

    (Effective only when one character stands in front of the other)

    Speed Attack Defence

    Characters on positions 2 and 4 gain a shield equal to 10% Max HP after battle starts, while characters on positions 1 and 3 gain 30% extra ATK SPD

    (Effective only when one character stands in front of the other)

    ATK & DEF Boost

    Characters on positions 2 and 4 gain 8% DMG Res, while characters on positions 1 and 3 gain 8% extra ATK

    (Effective only when one character stands in front of the other)

    Braver over time

    Increases all characters’ ATK by 1% per second after battle starts, up to 10%

    (Effective only when two characters stand in the same row)

    Tank Tactic

    All characters gain 20% DMG Res after battle starts, which is reduced by 1/4 every 5s

    (Effective only when two characters stand in the same row)

    Lifesaver

    All characters gain a shield equal to 10% Max HP after battle starts

    (Effective only when two characters stand in the same row)

    Balanced ATK & DEF

    Players in battle gain 6% DMG Res and ATK

    (Effective only when one character is resting and one is in battle)

    All-Round Protection

    Players in battle become immune to DMG for 3s after battle starts

    (Effective only when one character is resting and one is in battle)

    Perfect Recovery

    Players in battle regenerate 10% HP immediately after battle starts

    (Effective only when one character is resting and one is in battle)

    (You know have more info about this dungeon then I did, I discovered the existence of these today haha)


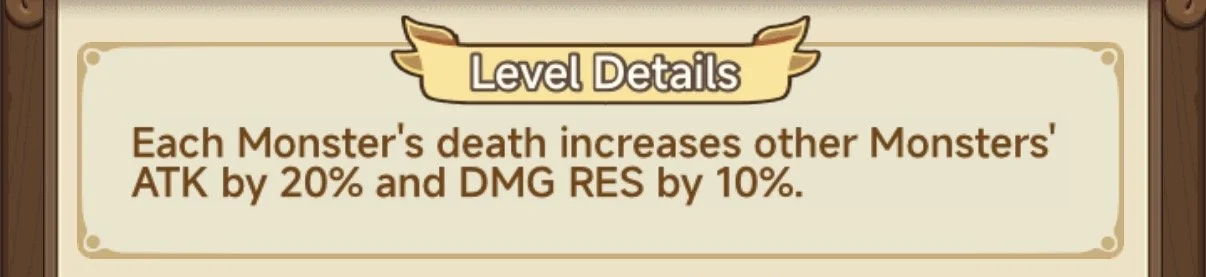
Each level will have its own effects like shown below, make sure to check these before going in:


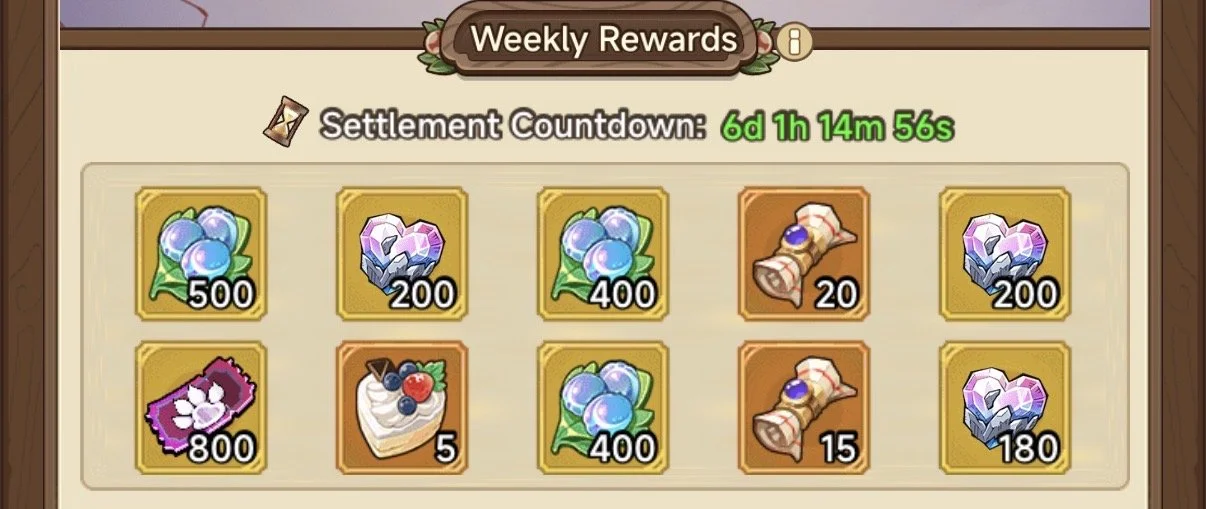
As you complete Difficulties you will be able to select more rewards. The best things in here are; ‘Gems of Love’, ‘Awakening Scrolls”, “Cakes”. If you have remaining slots Uku Fruit, Mimirs Spirngs and Tickets (Skill or Pal if playing Mage or Tamer) are also good options

These rewards are given every Monday at 00:00


Snowland Crisis

In here you can go in teams of 1-4, more is recommended if you struggle however different rules apply with the stamina so less may be more beneficial

When you go in as 1 you have 720 Stamina and 240 more is available in the shop. These numbers divide equal to how many players so if there was 2 of you you would have 360 and 120 in shop

The mode now has a Sweep feature where you will be able to get straight to the boss, if there is someone stronger who can complete the dungeon and has this available then go this route as it will be much simpler

The most common build used when having to clear through the monsters is a Blitz+Stall. However the build can change if you struggle more on the boss. You can use stuff such as Nature’s Renewal or Take it slow in skills or Healing Book relic can also be good here. Once you can live/sweep it is likely you will want to use your full dps set more


Since the release of Sweep there is much less needed to say about passing through the mode. However, if you are one of the ones in your server who is pushing it check out this guide below from Leroy, it has builds and extra tips!

Snowland Guide + Builds - By Leroy (Discord Link)

Family Brawl

Family Brawl is a Cross Server Family vs Family event. In here are more Skills you may need so try get going on this one early! It is also a great source of Awakening Scrolls and Souls

There is a shop in here, for more info on what to buy go here


Event Calendar

1. Sign Up - 1 Day
On Monday from 00:00 to 24:00 this phase will occur, it is an automatic sign up if your Family meets the criteria
(During this time Family changes are allowed)


2. Matching Phase - 6 Hours
Occurs on Tuesday between 00:00 and 06:00, this is where you will be placed into a Group
Groups usually contan 4 familes however sometimes this may not be the case
Over next 3 Days you will battle each of the families indiviually
(From now till the end of event no Family changes are allowed)


3. Preperation Phase - 18 Hours
On Tuesday from 06:00 to 24:00 Players may choose one of the 3 lanes (These can be changed by Leaders/Elders in the next phase). If there are inactive players or players who have not picked a lane they will be automatically filled using some of these players


4. Adjustment Phase - 19 Hours (Per day)
This Occurs between 00:00 to 19:00 on Wednesday, Thursday and Friday. This is where Family Leaders and Elders can adjust the Lanes and orders of players adapting a Battle Plan to beat the opponent!
(No further modifications can be made after 19:00)


5. Waiting Phase - 1 Hour (Per day)
This Occurs between 19:00 to 20:00 on Wednesday, Thursday and Friday. This is a delay between the cut off of modifications and the start of battle


6. Battle Phase - 2 Hours (Per day)
This Occurs between 20:00 to 22:00 on Wednesday, Thursday and Friday. Each lane engages in 1v1 battles until one family has no remaining players. The family that victories in two out of three lanes wins that brawl round


7. Settlement Phase
This Occurs after 22:00 on Wednesday, Thursday and Friday. This is when you will earn the rewards for winning or losing the days Brawl
(Seperate Rewards are given at the end of the week dependant on total performance)


Extra Information & Tips

It is best to wait until last second to save your battle plan as this gives the opposing server less time to react and alter their own

In-between rounds it is best to have your top players hidden (keep them in the top 3 of any tower), this way the opposing server has no way to know where they are. Likewise if you know the opponents have some strong players you can try to avoid theirs!

It is best to try for a 2 tower win vs opponents you are similar in strength to, however you need to cover the 3rd tower with 1-5 players so that you can’t lose by default. If a 3 tower win is possible then you should go for it for extra points

Parking Wars

Waiting

Pick a Class

The first thing you will see when opening the mode is a class selection option. There are 3 options and each serve a different purpose:

Class: Berserker
Effect: PVP Bonuses
Use: Defense strategies

Class: Guerrilla
Effet: Vision, SPD, Range Bonuses
Use: Monster Hunting

Class: Exorcist
Effect: PVE Bonuses
Use: Lightspawn killing (Ping-Pong)

It costs 3000 Red Gems to switch so I recommend checking which one most suits you and stick with it

Weekend Modes

This is split into two modes, Cross Server Showdown and Bounty Path. They switch every week and offer different rewards

The Cross Showdown will rewards more “Showdown Points” and the Bouny Path will offer more “Cross-Server Crystals”. These are then spent in the ‘Exchange’ tab. More info on what to get here


Cross Server Showdown

Showdown is the first of the two weekend modes, this one requires full server participation. Server points are calculated from all players in the servers top run added together, the total is then multiplied by the total number of ‘Lightspawn’ you have

You will be matched with the same servers as Parking Wars etc. The mode runs from 10:00 to 22:00 Saturday and Sunday with results being at the end on Sunday


Event Details

Lightspawns

Lifespawns are the ‘bosses’ that are located in the center city (Capital of Light). They are the main source of points for your server and for yourself, defeating one will give 50k points, if you don’t defeat it you will be given a % equal to the % you dealt of the 50k (If you did 50% damage you would get 25k)

They are essentially all HP and don’t actually hurt back, just like Lamp Theif (As a correlation to the fact, the best class to kill them is Warbringer) when attacking these you want to use your max damage PVE set

Note: Lightspawns HP fluctuate from event to event. You may find one time you do more and the next less


Pick a Class

The first thing you will see when opening the mode is a class selection option. There are 3 options and each serve a different purpose:

It costs 3000 Red Gems to switch so I recommend checking which one most suits you and stick with it

Class: Berserker
Effect: PVP Bonuses
Use: Defense strategies

Class: Guerrilla
Effet: Vision, SPD, Range Bonuses
Use: Monster Hunting

Class: Exorcist
Effect: PVE Bonuses
Use: Lightspawn killing (Ping-Pong)


Offline Loot

I didn’t notice this existed until way too late into the game so I will mention it so you don’t have to miss out, there is an 'offline loot’ chest which gives Medals and Gold so make sure to claim, it’s in the bottom left corner when you go into a city


Ranking & Rewards

There are 4 different Ranking boards with 3 Personal ones, depending on your strength/availability you will aim for a different one as each require different strategies. This is great for weaker players as you can still compete just as much!

Firstly, theres the ‘Personal Ranking’ this is based on the most points earnt in 1 run, they won’t add together. This is the one anyone doing Ping-Pongs is going to finish high on

Secondly is the ‘Defense Ranking’ this is based on total Player kills within your servers region. Ranking high on this one will require activity and some strength as you need to be able to keep an eye on who comes into your server and defeat them

Thirdly is ‘Monster Slaying Rankings’ this is based on total Monster kills. This can be scored on quite easily using the auto feature, but if others are doing more then 1 round each day you would have to do so to to keep up


Challenges ->
These replenish each event and are your main source of the Crystals. These are a priority to complete - They can be completed in one run if you do 1 full Lightspawn kill and players, you won’t need to spend 2k Red Gems for an extra run if these are done as you can finish the monsters in your own server!


Teleport

Once you have killed 3 people your location will be pinged to the server that you’re attacking, at this point I recommend teleporting
You will also need this feature when doing Ping-Pong to quickly get between each Lightspawn

Note: The teleport does have a cool-down, if you go to the wrong place you will have to wait a bit


Auto Attack

This can be used on Lightspawns, Players and Monsters. It will automatically start the fight if you’re withing range (and your attack cool-down has finished) To set it up you can switch which Unit it is attacking with the button on the right, then click ‘Auto’ and it will start

Note: You still need to opperate the character around the map it just starts fights


Event Strategies & Tips

Attack
Join an enemy server and choose a city, each city is stronger (They show the levels). The middle city is just for lightspawns and no monsters or players will spawn there (Although players who are active can go there)
To earn points in each of the cities you have options to attack players and monsters, there is also an Auto feature you can use which will automatically challenge players and/or monsters depending how you set it up

The main time you will go into cities are for; Monster Hunting, Challenges runs, getting your 3 kills for Ping-Pong

Monster Hunting
This is mainly something you will do if you aren’t able to take the lightspawns easily. For this Run you will want to use the ‘Guerilla’ class as it will help you get around the map quicker. I recommend going to the quietest opponent for this run so you can’t be disturbed

Challenges
For Challenge runs you just want to focus on getting the 50k points and the player kills as monsters can be finished in your own server if needed - If you can kill a lightspawn then do 1 in this run. For this run you can run whichever class you want, whichever you need for your other objectives. I recommend going to the quietest opponent for this run so you can’t be disturbed

Ping Pong
This is by far the best way to earn points, it is basically where you hit the lightspawns back and forth with another player, ideally someone similar strength as to not waste time waiting for lightspawns to be hit back (For this method to work well you need to be able to kill lightspawns around the time your teleport refreshes or quicker). For this I recommend using the ‘Exorcist’ class for the bonus PVE damage!

Note: For the most optimal Ping-Pong you want 4 players either side, this cuts out the need for teleporting and speeds up the process

Defence
This is the only way to directly stop your opponents getting points. Once an opponent kills 3 players in your server or takes a lightspawn message will appear on your screen. You can additionally use the Bounty button top left while in a city to find them directly. Once you have killed them they go into cooldown for a little bit, they can then choose to either spawn back where you killed them or teleport for Red Gems, your goal is just to follow them till they run out of time or give up. If you want to do this and aren’t planning on going for Lightspawns and such you can use the ‘Berserker’ class for bonus PVP stats


Strategy for Server Victory!
This strategy requires a lot of teamwork the premise: join an opponents server at 21:59 on the Sunday (as close to 22:00 as possible) as this is the last time you will be able to invade

The Set-Up
1. You can calculate how many lightspawns each server needs to get the win (Each Lightspawn is 20% Boost), this is going to determine which servers are a risk as well as how many spawns your server needs to get

2. NEVER have the Lightspawns before the timer if avoidable - If you have any it is 1 less you may end up with

3. Have enough players in each opponents server to take away the amont of Lightspawns you need to from them (If the opponent needs 3 to win then have at least 2 players in that server)

Now you’re all set up, you want to get your 3 kills for the extra time and sit and wait for the last 10s of the event, if you attack them at this point you are guaranteeing the opponent can’t take them back!
Any players unable to take lightspawns should go into defence to slow the opponents trying to take towers if you have any!

Note: All your invading players must be able to take a Lightspawn in 1 attack


Achievements
These are based on total points earned across all the times you’ve played the event. It is highly recommended you do these quick as it will really help getting your skill from the shop!

The most points?
The best way to get the most points is through Ping-Pong, once you are quick enough you can easily earn over 1 Million in one round

Ping Pong Rules
1. Never ping pong with more then 1 player, if you want another run get the same player as your last run as it will help increase their points too

2. If several of you on your server want to do Ping pong either get the same person or different servers to not help any one in particular boost their server!

3. If someone on your server is in a match of PingPong, DO NOT take any lightspawns or kill their ping pong partner, this messes up the run for both not just the opponent!

Bonus Info
Killing 3 Players adds 3 minutes to your run!

You can kill 10 Monsters a day on your own server earning you extra Currency!


Bounty Path

Bounty Path is a 1v1v1v1 Family vs Family Cross Server event. It occurs every other weekend on opposite weekends to Cross Server Showdown. This mode is split into two modes, one that happens during the day and one on an evening

One of these is PVP (Bounty Path) and the other PVE (Burglar Invasion), you can set presets for both seperately so make sure to do so correctly

Pictures when release


Bounty Path

This part of the event is the one that happens through the day, this is where you will earn the base of your points

During this part, you will send out “Deliveries”. To access these use the “Issue Delivery” button. The delivery window opens at 09:00 and deliveries last 3 hours
Deliveries will give rewards on completion based on their rarity (C to S) and your highest reached power. You can reroll these rarities however it can go up or down and it’s capped at 3 rerolls per day. Up to 3 deliveries can be done per day (if you aren’t present they will be auto sent at 10:00, 15:00 and 20:00). Once delivery is complete you can use the “Claim” button to finish and earn the rewards

Additionally, you will be able to fight other players and monsters. You will start the day with 3 challenge points, then replenishing at a rate of 1 every 2 hours. Attacking other players will grant you 20% of their delivery loot, and each player can be attacked up to 3 times during one delivery. Monsters on their end do not require Challenge points to be attacked, are always in group of 4 spread out on the map, and respawn at each automatic delivery timing (10:00, 15:00 and 20:00)


Strategy/Tips

Be online right at open to get your first delivery, any rarity over C will do as to not waste your 3 rerolls

(The earlier you can get started the better as you will have more chance to get all 3 deliveries done before 20:19 when the rewards for Burglar Invasion will be decided)

Challenge the highest rated players (The ones with the largest flag count below them) that you are certain you will win against to maximise your earnings, you can refresh your screen to find more if needed

Be around for each set of monsters and finish all 4 per set if possible to maximise your earnings again!


Burglar Invasion

This part is that which happens on an evening, the rewards from this are used to multiply your Base points to add a bit more challenge to the weekend!

This is a 1v1v1v1 family boss fight. There is a 10m rally period from 20:20 to 20:29, then the fight lasts from 20:30 to 21:00

The ranking is based on either the hp left of bosses when the timer ends or the faster killers
When it starts you will be given 4 items: bombs and 3 disruption items. The amounts given are determined by family rank before 20:20
The bombs will be used to increase the damage you do with the cannon on the boss, the disruption items will be used to disrupt other family bosses (Reducing cannon damage, Stopping the canon, Healing the boss)
Disruption items can be used against any other family boss to fill a meter, which when reaching 2000 will trigger the corresponding effect, and a 60s cooldown. You can still stack up the meter during the cooldown to have it trigger right as it comes off
There are 2 stations: left is bombs, right is disruption items. Each of them are dungeons, with Easy / Medium / Hard difficulty and fighting 1, 5 or 10 monsters in a row. Find the highest combination you can beat to earn more items. You can use then the automatic challenge button to make it less tedious. It is a good idea to start by fast farming bombs to upgrade the canon to max power, then 95% focus in disruption, the rest farming bombs to push power back up if you get disrupted

Note: During this fight you can turn off other members for a clearer view using the “Block other players” button in the top left. If you click another player you will have to exit the screen and re-load the mode to get back in!


Strategy/Tips

Have as many of you on as possible and all start with bomb donations, once completed run through the bomb dungeon first to collectively get enough to max out the cannon power. If you are coordinated enough some players can remain in either of the dungeons to collect more rewards (When left idle these PVE screens will speed up!)

Once the bomb bar is maxed you should all focus on getting the Disruption items from the other Station. With the disruption items you want to focus the family closest to your %, either to catch up or keep them behind!

Sailing Season

Waiting for one to come back

Drakebone Sanctum

Drakebone Sanctum is the best place to earn Guardian Summons and Remold Tokens so it is vital you do as much as you can each time it comes! It is a 1-4 player mode, I highly recommend having 4 as there are options to help each other and a teams ranking

You can change your outfit on the main screen, make sure this is your PVP set, you don’t need to actually fight the monsters they’re just done off the in-mode stats you have! (Which are based on your highest ever power)

This mode contains lots of white gem spending, for information on this go here
There is also shop to spend event currency, for advice on what to get go here


Event Calendar

1. Team Up - 1 Day
This is where you can view the servers you are matched against, create a team or join others’ teams!
If you forget to do this you can start a team when the dungeon has started you just can’t join a team that’s already in the dungeon!


2. Exploration - 3 Days
This is where you will explore the maps during 08:00 to 22:00, encounter chests and various monsters and events. This is where you can do the spending and earn loads of great rewards!

There are 3 floors, floor 1 and 2 are just fighting monsters and floor 3 you may encounter some players. There are traps on occasion across the floors, if you get stuck you want to press “Struggle” and then request help. Each trap is 15mins and each Struggle reduces 5mins, each team member can additionally remove your timer by 5 mins!

When you’re on Floor 3 other players can attack you, if you run out of HP you will go back to Floor 2. So make sure to use your stamina quick and not get removed from the floor!

Note: You can still join or create a team during this phase!


3. Settlement
The event ends at 22:00 Friday. This is when you will earn the ranking rewards!
There are 2 ranking sets, 1 for your team and 1 for personal results. The top rewards are as shown below:


Extra Information & Tips

It is best to play this mode when you have others in your team online as you can get stuck in traps or on other players/monsters so having someone to help makes pushing a lot easier!

There is a Auto-Explore feature you can activate if you really don’t have the time, this will only work while you’ve got it open like with Auto-Prayer. It costs 3500 Red Gems and doesn’t carry over so try to avoid using


Rewards & Shop
In the “Reward” tab, you’ll fine some challenges and an exchange shop;

For the challenges you’ll get rewards based on the stamina you have used and the points you have gained, make sure to claim these

In exchange shop you can also buy 5 “Sanguine Chalices” for 6000 Red gems each, you might want to save a bit of gems before the event starts to make sure you can get all 5


Battle Rules
This is one of the modes where your Power matters as it will decide the starting ATK and HP that you will have

As shown, I have 319865 ATK and the monster has 12427 HP, as I have more ATK then its HP, I would win. If I had less I would lose


Chests
There are chests you can claim, the chests and keys fall randomly so you may have one or the other. The chests themselves will automatically claim if you have keys but you will need to open them manually if you get a key after a chest

Keys are available in the store for $£ but they are not worth the cost so I wouldn’t recommend getting these


Stamina
Make sure to use your energy frequently enough that you don’t go over 30/30 as it will stop earning more at this point!
Additonally make sure you’re at 0 before the cut off on each day!

In the Pack Shop you can get a free 36 Hearts (Stamina) per day, you want to claim this when you’re at 0 also and quickly get it to go under 30 so that you dont waste anymore


Consumables
Dracolich Sigils and Sanguine Sigils can be kept from event to event so you don’t have to use them all if you have reach the ‘Efficiency’ point, which, for this mode I wouldn’t go over 200k points if you dont need to as this is where it starts to slow and you should be able to afford the priority items in the store!

You can keep the ‘Scales’ needed to jump from floor to floor from one day of the event to another if you want to start the next day with more, but you can only get the amount needed to go up (1 from floor 1, 2 from floor 2 - so if claimed from floor 2 you’d start the next day with 2)

Shroomie Tournament

The Shroomie Tournament is a cross-server battle mode for one or two player teams divided into six stages


Event Calendar

1. Signup - 2 Days
This is where players can create or join teams. You can either join within your server or use Team ID to search for your friend to join them!


2. Qualifier - 4 Days
This is where teams battle daily from 10:00–22:00 using a limited number of challenge attempts (10 for solo teams, 5 per member in duo teams), earning or losing points based on victories, defeats, opponent type, and battle speed, with the top 128 players advancing


3. Preparation - 1 Day
This is where players observe the top 128 can prepare for their next fights


4. Round Robin - 3 Days
This is where the remaining 128 are split into 16 groups of 8 for best-of-three 2v2 battles at 19:00, with the top two from each group advancing
Ties broken by victory count, then point difference, then Qualifier points, eventually narrowing to quarter-finalists


5. Elimination - 4 Days
This is where two-player teams battle from 20:00 until a champion is decided


6. Celebration Phase
This is where the winner is honored. Gems awarded on “Honoring:


Betting
All points earned during the event are turned into Guess Coins
During the Round Robin (until 18:30) and Elimination stages (until 19:30), players can earn and buy Guess Coins to wager on which players or teams will advance
Winning coins based on odds or losing half their wager if incorrect
All winnings during these stages are converted into more Guess Coins until the end of the event where they convert into Guess Points to Purchase Shop items
(Link to guide on what to buy in the shop here)


Extra Info
Battles also involve positional strategy, as players choose from four positions (two front-row and two back-row), attacks prioritize enemies in the same row, and if two targets are present, one is chosen at random

Make sure to check who you’re fighting, you may need to switch sets for different people. Additionally, have your partner tell you what to change to when doing their attacks so you can ensure as many wins in the first stages as possible!