Build Features

Here I will explain every feature that has some tie to building sets etc
Class specific information for everything in here can be found through Guides linked in Class Overviews

Classes

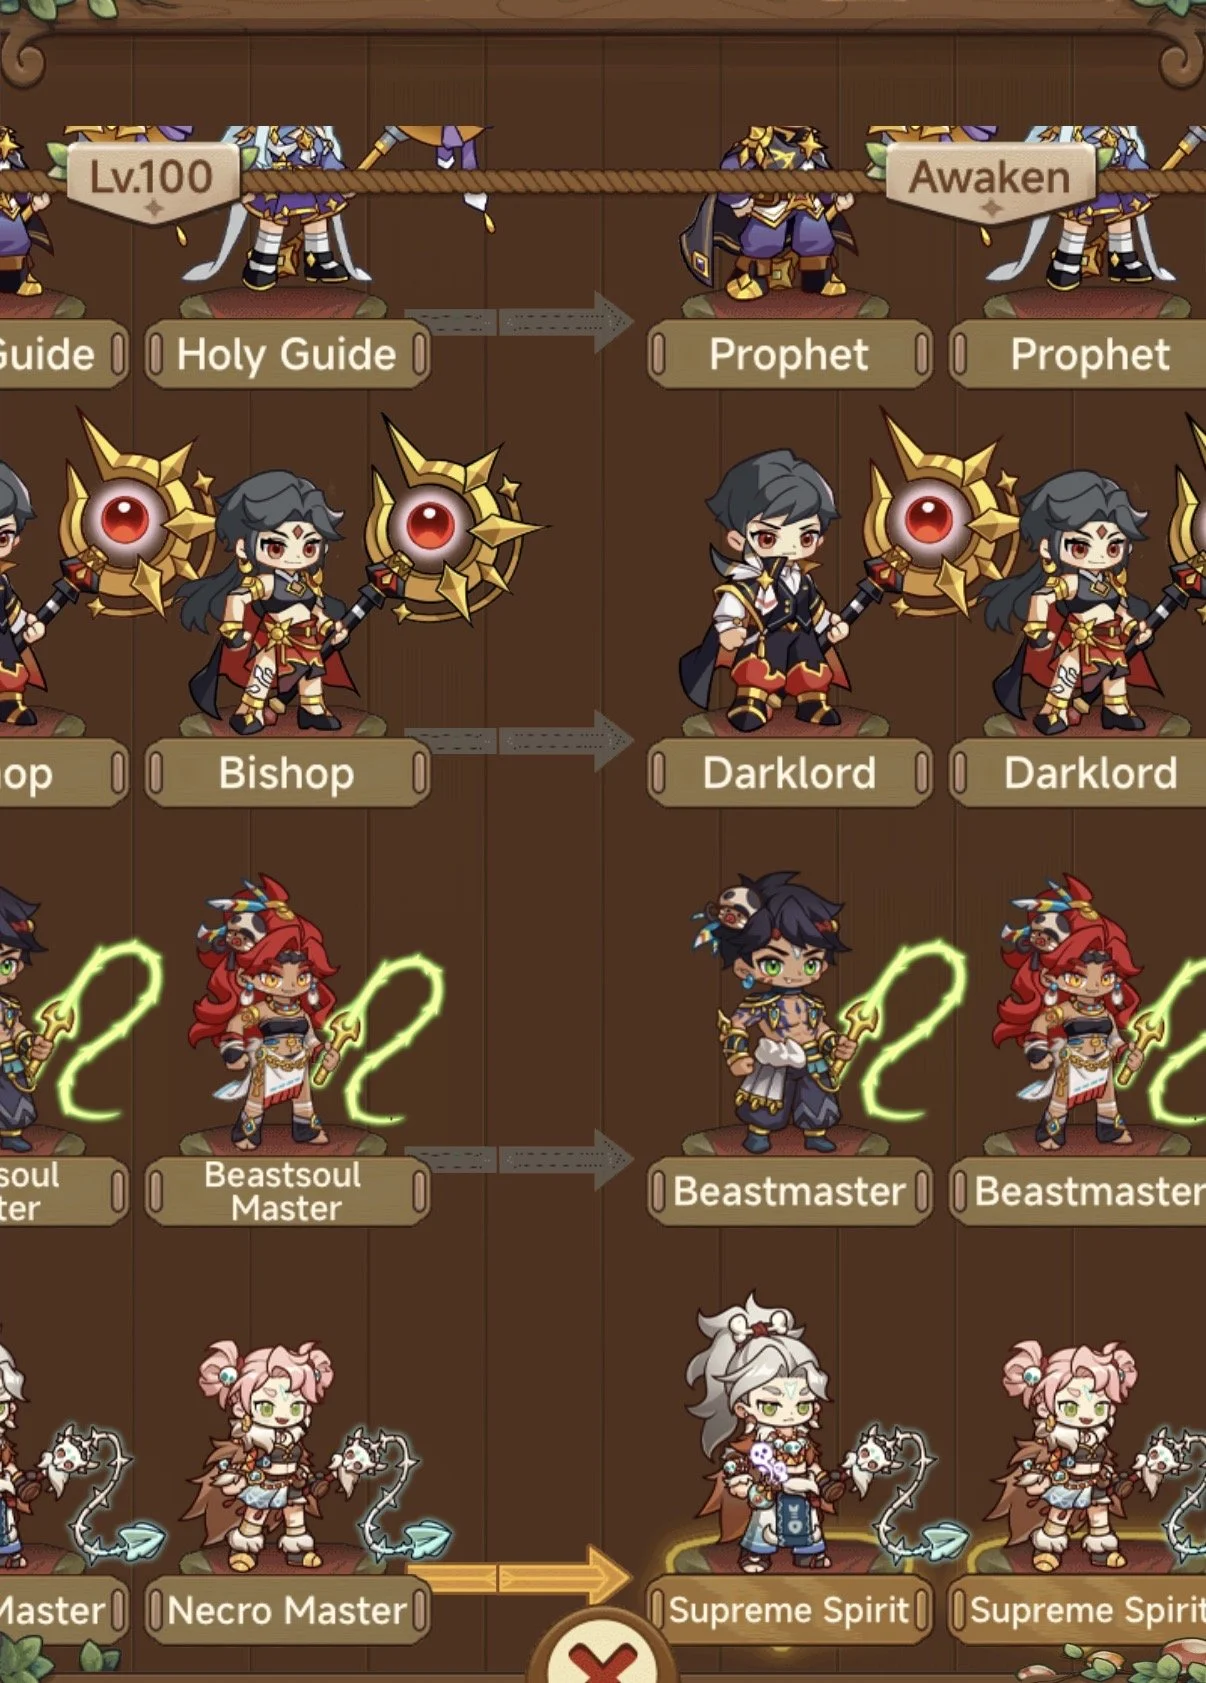
There are 2 splits for classes, Level 30 and Level 50. The choice you make at level 30 will reflect the path you follow through to awakening.

 (Don’t worry if you change your mind as you can switch as much as you like!) 


Level 30

Warrior

Archer

Mage

Spirit Channeler


Level 50

DPS 

Axe Warrior (Warbringer “WB”)

Wind Crossbower (Plume Monarch “Plume”)

Spell Caster (Darklord “DL”)

Beast Tamer (Beastmaster “BM”)

Tank 

Swordsman (Martial Sage “MS”)

Shadow Sniper (Sacred Hunter “SH”)

Healer (Prophet)

Spirit Shepherd (Supreme Spirit “SS or Necro”)


Each Class has its own style and i will go into more detail on these in Class Overviews

Gear & Lamp

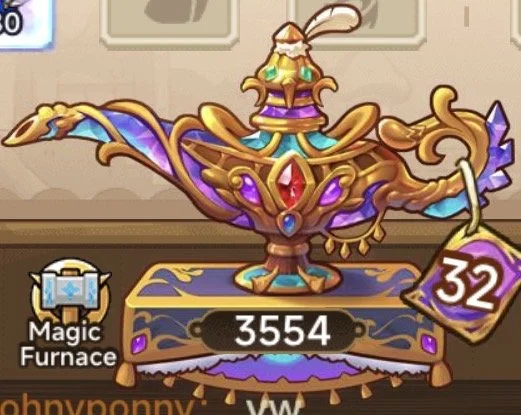
Collecting gear and opening lamps is the main feature for a long time. The boosts from your gear are what make up a good chunk of your progression. By the time you reach Aurous gear you want to assure all your gear consists of the 2 affixes you need to compliment your class most (More Details here)
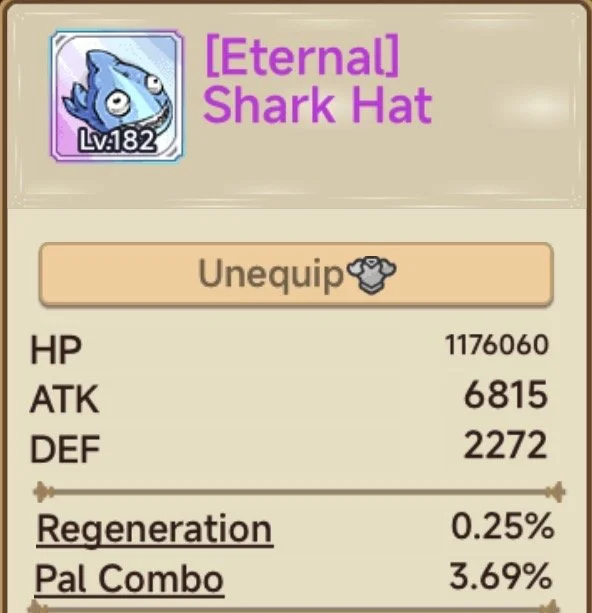

This is your Lamp upgrade screen, you upgrade your Lamp using Coins which you can get via progressing through Campaign and/or rolling the Lamp
in here it will show what chance of getting different stats you have and what you will have at the following level!

Aurous and Eternal unlock under a condition at a certain Lamp level, the condition will appear when you get close


Auto & Blocking

Upon reaching Character Level 16 you will unlock the Auto feature, this allows you to run your lamp automatically as well as set affixes/rarity for when you want it to stop


At Lamp level 12, 20 and 26 you can block out an affix, set these to any 3 that you don’t want. This is done by clicking on the gear icon top corner of the magic lamp upgrade tab and then in “Adjust”


Offline-Use and Backpack

This feature is much slower then using the Lamps while online however if you have a lot to go through and not a lot of time it’s an efficient method. The tick box will always turn itself off so press it each time you go offline to use the lamps up

When you come back online you can go to gear and check the “Temp Backpack” to claim your gear

Pals & Skills

These are a very big part of your build and can make or break your sets. The first thing is that you should NEVER use auto equip

There is not much I can really cover here just make sure you’re using pals that have deploy effects which compliment your class. There are P2W pals and event locked pals too, these will all show with “Event” written on them, below is some details on which these are and what to go for (Further details here)

Note: In PVP it is crucial you use Blitz in first slot due to the way skills are deployed - only exception is mages going for a ‘Pre-Blitz’


Pal Exclusives

Locked (Collab) Pals
These are the ones you can never get to make you aware when you see them in guides - If one is in a guide you will need to use something else if you don’t own it

P2W Pals
These are pals that will show up in the bi-weekly spending event, they are on rotation so some may take awhile to re-appear. For lower spenders I have gone through the ‘priority’ ones in the database, but for decisions on what to get check out guides for your class!

Note: Some of these can be available to F2P in the bi-weekly events by completing all the tasks 


Skill Delays

The only thing that needs mentioning for Skills is Delays (PVE only feature)
You can set a delay by clicking the two opposite arrows and then the clock with a cog on it as shown in the picture
These are very important to split up skills such as slows or defensive skills to maximise your potential

Different set-ups are better for different classes/builds, guides for this info are linked in Class Overeviews 
For early game players: I will go into detail about sets to use based on what's unlocked in Early Game


Gatchas

There is one for Pals and one for Skills, these are rush events so I would definitely recommend holding onto as many tickets as you can for each rush 

As the Gatcha levels up the % chance of getting the higher rarities will increase, this is only really important for tamers/mages who want to get the pals/skills to the highest level possible 

When you are using the tickets, only use the highest draw amount, x35 or when you reach level 15, x999

Note: If you are a Mage (Skills) or Tamer (Pals) these gatchas will eventually become your main place to use Diamonds. Once you have your souls around level 60-70 is when I would recommend changing to tickets for these two classes

Relics

You can get relic shards from the Ruined Ancient City Dungeon

(Relics are a rush event, so definitely wait on using your shards) 


Levelling Priorities

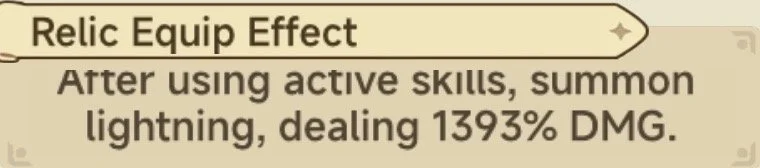
Once you have all your relics unlocked, you want to focus on leveling up your main spore and any of the relics you use that have a changing bonus, such as the “Thundercaller Kite” where the % DMG increases with levels


The passive effects on all relics however, are applied whether you are using the item or not, so once you have levelled your spore and effect changing relics you should use the remaining Relic Shards to equally level all of your relics, UNLESS you play Tamer in which case you should only be focussed on the % changing relics you use

Awakening

Awakening is the process you need to complete to reach the final tier of your class evolution, but it also involves unlocking some pretty powerful upgrades!


To start you will need to collect “Awakening Crystals” from Cross Server Arena and/or Spending Events, you need 6 in total to complete awakening

Note: You can’t choose what order the slots unlock unfortunately

Once unlocked you can level them whatever way needed, you may also refresh as much as is needed - refer to guides for more specific levelling info


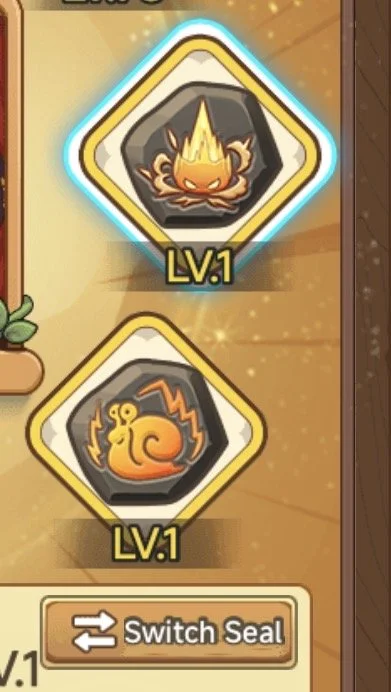
Something you may not notice straight away, the middle and bottom right slots can be changed depending what you are after, simple click on the one you want to change and select “Switch Seal”
(It will auto select to the ones likely for your class each time you change class)


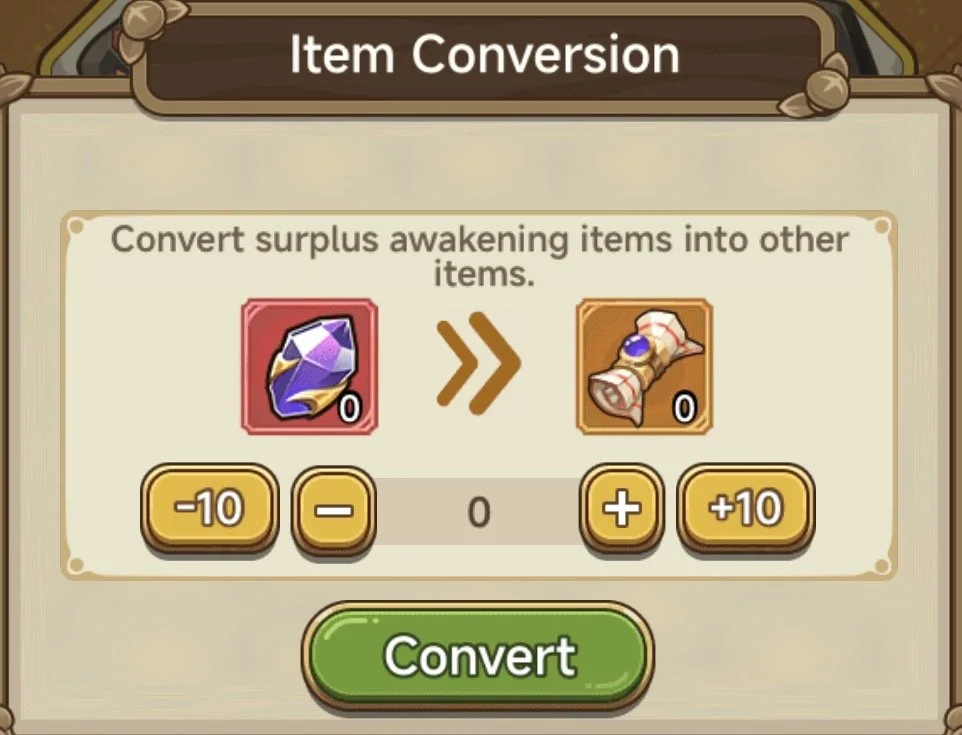
Finally, you can swap Awakening Crystals for 20 Awakening Scrolls if you acquire one after Awakening!

Star Heroes

On the Star Heroes page there are 3 tabs to go through, “Star Hero List” is just where you can view all your cards and level them up. The other 2 are;


Star Array

Here you will be able to set up your presets for Star Cards and View your Developing Card Array

Limited Time Cards
Some cards come out in limited events and to the knowledge of the playerbase, these are non-returning cards. If you are new and don’t have them then you will have to use something else when suggested to use one (More details here)


Battle Star Array

The main thing to note here is there are 3 types of cards, Shield, Active and Passive. You must have all cards be of the same type as the Main card, if they are not then the supports will not be activated


Creating Arrays

Each class will have better and worse cards to use
Once you have unlocked a majority of the cards you will likely be able to create the ‘prefect’ array for yourself, find guides for info of what to use in here
However, in the early game you may not have the same freedom - I will go over the ideals for the entry classes as well as other potentials here

Creating an Array is simple: search for a main card that works best, then pick support cards that; match the type, have useful bonuses and fit within the “Cost” cap of 10
When picking you can use the filters as shown to make sure you select the right type


Developing Star Array

Developing star arrays are used to get extra awards, such as “2% more Parking coins when collecting Mounts”. These are very good little bonuses. I would recommend using “Genie Of Wishes” and “Chrono Sprite” once you have them unlocked as they offer more unique rewards, the other two can be anything you think is useful

If you have the limited cards I do then this is also very good array, but I will likely substitute Goddess for Chrono Sprite once I have gotten all my base runes


Star Hero Draw

This is where you can use your Pact Coins and Pact Coupons to get new and duplicate cards (duplicates are used to level up your cards)
Every 100 draws (since your last) you are guaranteed an SSR. Bear in mind that you aren’t always guaranteed cards, sometimes it can be some random items like lamps
You can turn your coins into Coupons by clicking on your Coupons to save time

(Remember that this is a rush event too so I advise saving all your coins and coupons for the rush)


Star Hero Exchange

Once you level up your star card to 10 Stars, every duplicate you receive will be used to convert into “Guardian Starcores”. These are currency in the “Exchange” shop within Star Hero Draws. This currency is also available in the Star Hero Rush

For advice on what to get in here go here

Avians

Avians are notoriously annoying to get correct, the RNG on them can be ridiculous, however the bonuses you can get from them are worth the wait


Overview

Avians come in 3 different rarities, with 4 different rarities of affixes :

(Technically 5 but we never want Grey) 

You may assume higher means better however this isn't always the case. The main thing, especially early on, is that the affixes you have are the “Correct” for your class, once you have the affixes you can get the “Correct” Avian for your class with them on it, details on this in here

(Avoid any with grey affixes as these you will struggle to get rid of in breeding)


Breeding

To Breed avians you need “Sweetheart Cakes” you can get these in a few ways but the best is from the weekly reset and Cloud Ascension
Once you have the cakes you want to breed 2 Avians that have the same affix (the affixes you want) as there is a higher chance for the ‘child’ to come out with that affix, this is how you can start to piece together your ‘perfect’ avian

Avian breeding time is dependant on the “Gen” this is at the top next to the rarity. As this gets higher the breeding time gets longer. To the right of the “Gen” you will see Hearts, this is how many times the Avian has been Bred, the higher this gets the longer its cooldown after breeding will be
Because of both of these you want to try use newer avians as often as possible while pushing for your perfect avian just to speed things up!


Growth Rate

Each avian also spawns with a “Growth Rate”, this impacts the quality of the stats, the closer you can have it to 1.5 (the max) the better as this raises the base stats of the avian! You can also use “Rebirth Capsules” to increase this growth rate 

(Below the Hatch Avian tab)

However this can have horrible RNG too as the growth rate may go up or down

These can be obtained through Snowland or Cloud Ascension


Extra Information

Resetting
When resetting an Avian you DO NOT want to use any option except the Potions, any other will be a loss of 20% materials and/or a waste of Red Gems. Instead you can buy Potions from shops or get them through Snowland

Levelling
When levelling Avians, every 10 levels the effects on the affixes will go up by 10%, but for that 10th level you need Mimirs Springs, these eventually become a huge bottleneck later so the earlier you can start collecting them the better!

Energy Regen Speed Applied
Energy Regen Speed works on Avians - In some cases it is possible to get Honeypot bee down to around 2s for example
This really opens the pool of available avians in my eyes for other classes if you can push high Energy Regen Speed

Collab Avians
During Collabs new (exclusive) avians may be released, these will have special stats on them and require a different breeding resource

I recommend you save as many of these as possible in hopes someone else on your server has gets the affixes you want, at which point you can use theirs to have a higher chance at getting a better one yourself

List of these here

Orange Affixes
These provide worker bonuses to be used in Manor

The best affix is “Work Light” as it will help you save food resources when using your workers. 

Another one I would suggest getting is “Mine Blast”. The workers in the mine use significantly less stamina than the rest so you don’t need Work Light here and this affix will get you more ore in the mine

More info about worker affixes here

Souls

There are a few different parts to souls which I will go through. Below is a list of important bits to note

For priorities when levelling souls go here

Remember levelling souls is a rush!

Key Points

  1. Once your mount is level 7-1 Souls are the next most cost effective thing to spend your diamonds on (Usually until your main souls are level 70)!

  2. When you salvage souls you will get all the soul essence you put into the soul back in full!

  3. You can’t salvage Pink Souls but you can reset them just like with Reds

  4. When you create a pink soul the soul will be the same level as the Red you fused to create it!


Acquiring

To acquire souls you first need to progress through the Soul Trials, this will unlock all the soul slots at different levels (finishing at 200)
You can then use “Soul Crystals” in “Soul Prayer” to roll for more Souls
You want to use the highest rarity you have, when all the runes are above blue, purple, yellow I would apply the “Auto Salvage” to auto scrap any below on draw

You can aqcuire Soul Essence by salvaging souls


Creating Pinks

To create a pink you need a Soul II. You can “Fuse” a Red soul with a Red Soul II, merging the main stats of the two souls. You do this in the “Fusion tab” as shown above

Each class has its own recommended order for getting pink souls (More details here)

(Make sure to select the correct Red Soul 2 as what this section tells you, otherwise you will have to wait till you get another Selection 2 to do it)


Bonus Stats

When you create a pink soul you also get a 3rd stat bonus which can be changed by fusing the pink with another red of its origin 

(You do this the same way as making the pink but using 1 Pink and 1 Red) 

Note: Although you can Salvage red souls it is not recommended due to this feature until that 3rd affix is a desirable stat AND Legendary Rarity

Divining

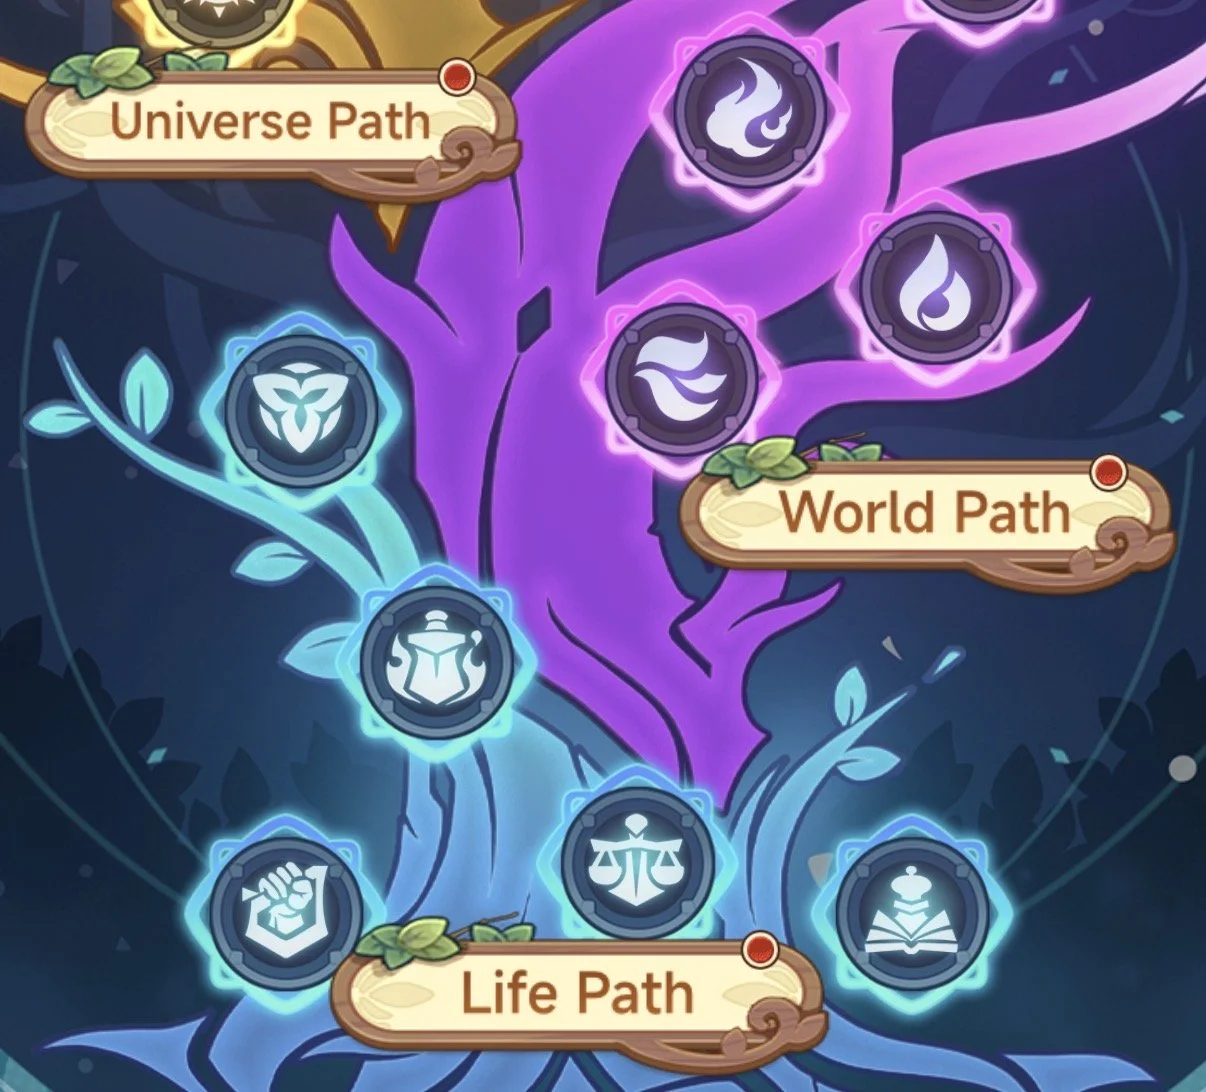
This can be confusing when you first unlock it. There are 3 “Paths”: Life, World and Universe. Each with a set amount of “Branches” on them. I will go through what you want to do and some common stats

Flames of Wisdom are a rush!

For class specific info go here


What to Do

The idea is to get to Universe before investing too heavily into any given branch, due to it taking a long time to reach the end
I would suggest you use Auto Intercept and put the stat you want in there, start by looking for grey and work up. 

Once you get it as red, lock the node

You will stop this process when either: 

You get the stat as Red

You have unlocked all nodes on the branch

(If you finish a branch but haven’t unlocked the nodes create a new tree for something else, such as PVE, it’s better to hold onto your soul sigils to start)


Resources & How To Get

The two resources used are “Flames of Wisdom” this is your main one for rolling affixes. The second are “Soul Sigils” which are used to roll after locking a node in

Flames of Wisdom

Your main source will be the Dungeon: Sacred Tree Trials 

You can also get them as rewards in Drakebone Sanctum and as bonus rewards in Spending Event passes

Soul Sigils 

It's a bit harder to get these, which is why we don’t want to use them too quickly. 

You can buy these in the following shops; Family, Cross Server Showdown and Pantheon. These are one of your priority buys due to being so rare. You can also get them in Drakebone Sanctum


Common Stats

Crit/Combo/Counter/Pal Combo/Pal Crit

Important for all to help stay at 100% or overcap

Pierce/Pal Inspire

Great for DPS classes, especially vs Tanks

Ignore Block/Ignore Pal RES

Great for DPS classes, especially vs Tanks

Ignore Crit/Ignore Combo/Ignore Counter

Important for tanks, especially vs DPS

Ignore Pierce/Ignore Pal Inspire

Important for tanks, especially vs DPS

Guardians

Guardians are incredibly strong allies, however they take awhile to get and so it is important you choose your guardians wisely

For more specific details on Guardians check here
For a full run down of TPEN and Tenacity check here


Resources & Obtaining

Summon Stones

You unlock guardians using “Summon Stones” in the “Summon” tab, this will draw either “Shards” or a whole guardian at a lower rate. Here are the main ways to get summon stones: 

Daily
You can buy 10 per day for 15,000 Diamonds (Highly Advised)

Drakebone Sanctum
You can also get extra stones through here, this will provide quite a lot depending on how much you spend ($£)
More details on this event here

 (Remember these are a rush event so hold onto them!) 

Shards

You may also get purple or orange shards via DrakeBone Sanctum
There are Purple and Orange shards, and you can either get them as Random or Selection. I recommend holding onto the selection ones until you have enough to get a guardian in full

Track Shard Progress in the main page, they will appear like this:


Rarities, Stars and Merging

By using summoning stones the highest rarity you can get is a Purple (Wrath Soul), with Shards you can get to Orange (Spirit Soul) but this will take time

Merging Green & Blue

You can merge Guardians as shown above
To merge up to Purple you just need 5 of the rarity you’re merging 

Note: Make sure the one in the first slot (one with the sword) is your main guardian as this is the one that will replicate the “Remold” stats to the new Guardian 

Staring Purple & above

To merge Purple/Orange into Orange/Red you need to first star up your Guardian to 5 Stars

When starring you can reset and try again to hunt for better remold, this is a great method and is worth the time and Gems, more details in a guide from Joltz here

(Make sure the one you’re staring up is your main Guardian)

Merging Purple & above

Once you have your 5 Stars you can merge it again 

This time however, it will require 1 Specific Guardian so make sure you leave one of these instead of using it to star your Guardian up

(If you make a mistake you can reset your guardian but you may lose remolds)

Hero Souls (Rainbow)

Hero Souls are the final rarity of Guardians. To merge them it’s just like making the last however you will need 200 Prismatic Stones which can be bought through Drakebone Sanctum Shop

With these Guardians you can only have 1 of each, duplicates will be added as stars
In the long run, you will be able to have the extras there as any that aren’t being used will still deploy 30% of the Remolds!! This will take a long time to get to but will be completely worth it


Remold & Common Stats

It is important to note, Guardian Remolds are active constantly and not just while the Guardian is alive. Additionally the “Hero Guardians” remolds are effective even when they are not equipped (But only 30% ability)

Each rarity will have a different amount of Remolds available, the later ones will have extra slots that unlock at different stars also as shown

(Which can be used to an advantage as I mentioned before)

To change the remolds you will need the Remold Stones, these are incredibly rare with the main drop coming from Drakebone Sanctum


Remodelling

When you are remodelling it works like divine, you do not have to lose the stat you had unless you click “Replace” so keep going!


Auto Pause

There is also Auto Pause where, like with the intercept feature of Divining, you can have it stop you when you reach what you’re looking for


Details 

There is a Details page in the top right, in here you can view each type of nodes available stats and the maximum amount


Common Stats 

These are just like any other stat bonus, I will go over the common choices as I did with Divining. There are 4 ‘types’ in remolds, ‘Wind’, ‘Earth’, ‘Sun’ and ‘Moon’, each having their own set of available stats

(Tenacity and Tpen I will go over separately in here)


Wind

Crit, Combo, Counter, Pal Crit, Pal Combo
Or
Global ATK and/or Evasion

Earth

Ignore Crit, Ignore Combo, Ignore Counter
Or
Ignore Evasion - Late game

Sun

Pierce/Pal Inspire - Good option for dps
Final DMG Boost - Very good option

Moon

Ignore Pierce/Ignore Pal Inspire - Good option defensively
Final DMG Res - Very good option

Mount

When you open the mount page there are 4 tabs as shown below

For more details on Advanced Mounts and parking rewards check here


Upgrade

This is the main page, here you can upgrade your main stats by upgrading your mount. To upgrade your mount you will use clock winders which can be obtained from the Chrono Tower Dungeon

Clock Winders are the best place to use Diamonds until your mount reaches level 7-1 at which point you never want to use diamonds on this again

(Remember there is a rush for the clock winders) 

For every Tier you reach you will also get a boost to your evasion stat


Empower

This page is an “as you go” progression page, the bonuses in here aren’t amazing and you have no control over these so don’t worry about it too much


Advance

This is where you can view and equip your mount morphs, the “Ride” button under the visual is a cosmetic trigger, the “Use” button is the one that controls whether it is being equipped or not

In here you can also upgrade your mounts either using duplicates or Mount Stars which are obtained through Spending Events and Feather Shop


Remodel

Finally, “Remodel” this is another passive progression page, using the “Remodel Guides” you acquire through parking wars you can level up your mounts for more base stats. For this I recommend leveling your mounts equally for best value

Artifact

Like with Mount there are a few tabs on here;


Upgrade

To upgrade your artifact you use “Divine Hammers”, these are not a part of any rush so feel free to use these as soon as you get them. Divine Hammers are quite rare to get, the best place to get them is in a Spending Event shop 

Like with mount you get a bonus stat for every 10 levels, in this case it’s Ignore Evasion which is very important in late game, so the further you can get with this the better


Morph

This is the same as the mount's “Advance” page. With Artifacts however you can only get the stars from Spending Events


Enchant

There’s a lot of information to go over with these, so I will run through the basic information here and provide more detailed class specific information in Class Overview


How to Obtain

You get Runes via the Flame Temple dungeon, in which you can either select 4 types you want, or receive them randomly.
There is a LOT of RNG with these so it is best to select the ones needed


Explanation

You will notice there are 6 Slots, for runes, on the left side you have HP (Slot 1), ATK (Slot 2) and DEF (Slot 3), on the right side the main stat can change, you will want to look for a rune with the stat you want. Each rune then also has up to 4 affixes

Runes gain bonuses if they are in a set of 2 (5%) or 4 (15%) for the stat on the rune

Note: When you are upgrading a rune keep in mind that once it hits level 10 you start to lose some of the Runestone Essence you have spent on the rune, so try to find the best rune you can before upgrading past level 10

Note: If a rune has “X DMG Res” as its main stat on slot 5 or 6 it cannot have a secondary Affix with the same DMG Res


Resources

Runestone Essence
Use: These are used to upgrade your runes
Where to get: Primarily from Salvaging runes


Runestone Restore Potions 
Use:
Used to cancel an upgrade (More details below)
Where to get: You can get these from the following shops; Cross Server Showdown, Family, Pantheon


Runestone Block Potions
Use:
These are used to block certain affixes being upgraded
Where to get: These will passively come in, if you need extra then go to Family Shop


Using Potions

Every 4 levels one of the affixes will level up, you can use Runestone Block Potions and Runestone Restore Potions to choose which affix will level as shown. It is best to do this when you have a Pink Rarity rune with the stat most needed for your class

Back Accessory

Once again this part is split up into a few tabs;


Upgrade

This is where you can use the “Feather Coins” from Dark Trials, you have a choice here between ATK, HP and DEF
I would always recommend upgrading ATK first early game as it will help you more with pushing PVE. However as you go further through the game you will want to start getting the other two, depending on your class and what you want to play later in game will determine which you should upgrade with more priority
Refer to Class Guides to see what these priorities are

You may notice there are Tails “Feathers” that unlock at different level points, once you reach all 3 tails (level 120 on all 3 stats) you will get an extra level added to each stat, you can however have the other two at different levels, I would ensure these are at the highest costing level before making the 3rd stat go up one (10th level is always most expensive, 120, 130, 140)

Once all three stats reach level 140 you can push them all to 250

(This is a rush event item so save as much as you can)


Morph

This is the same as the previous 2 sections. Here however, there is no Red star. You will get these stars from Feather Shop


Talents

These can be quite confusing when you first start out so I will try to explain it as best as I can
Refer to class guides for what to get in here

There are 4 pages, “Fury”, “Archery”, “Sorcery” and “Tame beasts”


You may use 1 branch on each page before acquiring an ‘End Node’ :

(Above are the 3 branches that will be on each page and an example of an end node being reached) 

Once you have unlocked an End Node you may use another branch on that page


You will use the ‘Divine Feather Coins’ that you get from Dark Trials to advance in here

Note: The basic attributes aren’t always your no1, check to see how much they’re actually increasing your stats to see if you need to bother with them as much at a given time. It is likely that the other nodes (while low cost) will be more beneficial